
How To Sight In a Crossbow:Step By Step
If you’re a beginner or an experienced crossbow shooter, sighting in a new scope can be a challenging task.
Sighting it in properly is crucial to achieve accurate shots and hunt effectively. However, it can be frustrating if you don’t know how to do it correctly.
Although some scopes may not sight in properly, it’s usually a matter of technique.
By following these guidelines carefully and our guide on mounting your crossbow scope, you can sight in your crossbow scope quickly and easily.
How To Sight In a Crossbow Scope: Step By Step Details
Sighting in a crossbow scope is a crucial step in ensuring that your shots hit the target accurately and consistently. Here is a step-by-step guide on how to sight in a crossbow scope:
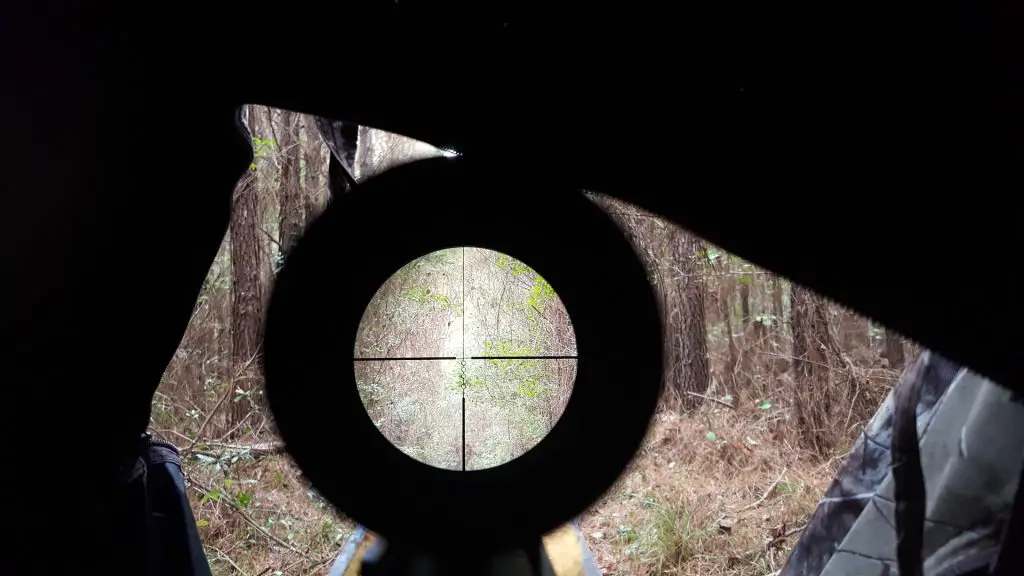
Step 1: Mount the Scope
The first step is to mount the scope on the crossbow securely.
Make sure the mounting screws are tight, but not too tight that they damage the scope or crossbow. Ensure the scope is level with the crossbow and the rings are aligned correctly.
Step 2: Pre-Sighting Preparation
Before sighting in the crossbow scope, prepare the crossbow and scope by ensuring that the bolts or arrows are of the correct weight and length.
Check that the scope and crossbow are clean and free of any dirt or debris.
Step 3: Initial Sighting-in
Set up a target at a short distance, around 10 yards away. Shoot three arrows, and then adjust the scope so that it is in line with the bullseye. Use the adjustment knobs or screws to make any necessary adjustments.
- Adjust windage: Using the windage adjustment knob or screw, make small adjustments to the horizontal position of the scope until the crossbow is hitting the target where you want it to.
- Adjust elevation: Using the elevation adjustment knob or screw, make small adjustments to the vertical position of the scope until the crossbow is hitting the target where you want it to.
- Shoot a second group of arrows: After making adjustments, shoot another group of arrows at the target to see if your aim has improved.
- Fine-tune windage and elevation: If needed, make small adjustments to windage and elevation to fine-tune your aim.
Elevation/windage knobs Adjustments
As you adjust the elevation/windage knobs on your crossbow scope, you will hear a clicking sound.
Each click represents a specific unit of adjustment, usually measured in M.O.A (Minutes Of Angle).
In most scopes, one-click equals a 1/4″ adjustment at a distance of 100 yards.
Alternatively, it equals a 1/20″ adjustment at a 20-yard distance.
If your crossbow scope uses different values per click, refer to the instruction booklet provided with your package for clarification.
Step 4: Fine-Tuning
Move the target to a longer distance, around 20 yards away. Shoot three arrows again and observe the groupings. Adjust the scope accordingly, making sure the crosshairs are in line with the center of the grouping.
Step 5: Testing
Move the target to a further distance, around 30 yards away. Shoot three arrows and observe the groupings. Adjust the scope again, making sure the crosshairs are aligned with the center of the grouping. Repeat this process, moving the target further away until you reach the desired distance for your hunting or shooting purposes.
Step 6: Final Check
After completing the sighting-in process, shoot a few more arrows to ensure that the scope is working properly and the crossbow is hitting the target accurately and consistently.
How To Sight-in a Crossbow-Step By Step
The sighting-in process is the most critical step in ensuring that a crossbow is accurate and ready for hunting or target shooting. There are several steps involved in this process, including initial sighting-in, fine-tuning, and testing.
Initial sighting-in:
The initial sighting-in process is a crucial step in ensuring that a crossbow is accurate and ready for hunting or target shooting. Here are some more details on how to carry out this process:
a) Choose the right distance:
The first step in the initial sighting-in process is to choose the right distance to set up the target. The distance will depend on the type of crossbow being used and the shooter’s experience level. For beginners, it is recommended to start at a shorter distance, such as 10 or 20 yards.
b) Fire a few shots:
Cock your crossbow using a rope or crank aid. Once the target is set up, fire a few shots at the target to get a feel for how the crossbow is shooting.
Note the point of impact and adjust the scope accordingly. If the arrows are hitting too high, adjust the scope downwards, and if they are hitting too low, adjust the scope upwards.
Similarly, if the arrows are hitting to the left or right of the target, adjust the scope accordingly.
c) Use a sighting-in tool:
For more accurate sighting-in, you can use a sighting-in tool. These tools help to adjust the scope quickly and accurately, allowing you to get the crossbow dialed in faster.
Some examples of sighting-in tools include laser bore sights, crossbow sighting scopes, and reticle alignment tools.
d) Fine-tune the crossbow:
After making the initial adjustments, fire a few more shots at the target to see if the crossbow is hitting the target in the desired spot.
If the arrows are still not hitting the target accurately, make additional adjustments to the scope until the crossbow is hitting the target consistently.
e) Record your adjustments:
To avoid confusion and keep track of your adjustments, it’s a good idea to record the adjustments you make to the scope. This will make it easier to fine-tune the crossbow and ensure that it is ready for hunting or target shooting.
Remember to always practice proper safety procedures when handling a crossbow and to practice regularly to maintain accuracy and proficiency.
Fine-tuning:
After the initial sighting-in process, it’s important to fine-tune the crossbow to ensure that it is shooting accurately and consistently. Here are some additional details on how to fine-tune a crossbow:
a) Adjust the scope:
The first step in fine-tuning a crossbow is to make small adjustments to the scope.
For example, if the arrows are hitting slightly to the left of the target, adjust the scope to the right by a small amount.
Similarly, if the arrows are hitting slightly high, adjust the scope downwards by a small amount. Continue making small adjustments until the crossbow is hitting the target consistently in the desired spot.
b) Use consistent form and technique:
To maintain accuracy and consistency, it’s important to use consistent form and technique when shooting the crossbow.
This includes things like maintaining proper posture, grip, and trigger control.
By using the same form and technique every time you shoot, you can improve accuracy and reduce the need for constant adjustments to the scope.
c) Experiment with arrow weight and type:
Another factor that can affect accuracy is the weight and type of arrow being used.
Experiment with different arrow weights and types to see which ones work best with your crossbow. Keep in mind that different arrows may require different adjustments to the scope.
d) Practice regularly:
Finally, the key to maintaining accuracy with a crossbow is to practice regularly. Regular practice will help you develop muscle memory and improve your form and technique.
It will also help you identify any issues with the crossbow or the scope so that you can make necessary adjustments.
Testing:
Once you have completed the initial sighting-in and fine-tuning processes, the final step is to test the crossbow to ensure that it is shooting accurately and consistently.
Here are some additional details on how to test a crossbow:
a) Shoot multiple arrows:
To get an accurate assessment of the crossbow’s accuracy and consistency, shoot multiple arrows at the same target.
This will help you identify any issues with the crossbow or the scope, and make any necessary adjustments.
b) Shoot at different distances:
To ensure that the crossbow is accurate at different distances, shoot at different targets placed at various distances.
This will help you determine the maximum effective range of the crossbow and ensure that it is shooting accurately and consistently at all distances.
c) Test in different conditions:
To prepare for hunting or target shooting in different conditions, it’s important to test the crossbow in different weather and lighting conditions.
Shoot the crossbow on a sunny day, a cloudy day, and even in low-light conditions to ensure that it is shooting accurately and consistently in any situation.
d) Make final adjustments:
Based on the results of your testing, make any final adjustments to the crossbow or the scope.
For example, if the crossbow is consistently shooting high or low, make small adjustments to the scope until it is hitting the target in the desired spot.
Tips for success: Sight-in a Crossbow
Here are some tips for success when sighting in a crossbow scope:
- Use a sturdy rest: To ensure accuracy, it’s important to have a sturdy rest when sighting in a crossbow scope. A shooting bench or tripod is recommended to eliminate any unnecessary movement and provide stability for the crossbow.
- Use high-quality arrows: High-quality arrows are essential for accuracy and precision when sighting in a crossbow scope. Choose arrows that are consistent in weight, length, and stiffness.
- Start at close range: Begin sighting in your crossbow scope at a close range, such as 10 yards, and gradually increase the distance as you become more comfortable and accurate.
- Take your time: Sighting in a crossbow scope requires patience and attention to detail. Take your time and don’t rush the process. Make sure each shot is properly aligned and focused before making any adjustments.
- Adjust windage and elevation separately: When making adjustments to windage and elevation, it’s important to adjust them separately. This allows for more precise adjustments and can help you avoid overcorrecting and potentially losing accuracy.
- Keep a record of adjustments: Keeping a record of the adjustments you make to your crossbow scope can be helpful in the long run. This allows you to refer back to previous adjustments and can help you make more informed decisions about future adjustments.
- Test your accuracy: Once you’ve sighted in your crossbow scope, it’s important to test your accuracy at different distances and in different conditions. This can help you identify any potential issues and fine-tune your crossbow for optimal performance.
Check-How Crossbows Work
Conclusion
If you know how to zero in your crossbow scope, it is fairly easy to use. It is a good idea to test the accuracy of your scope by zeroing it in at various distances to determine if the trajectory is consistent.
Remember that the accuracy of your crossbow can change over time, so it is important to check it periodically. Always prioritize safety while hunting and enjoy the experience!
Resource: Tenpointcrossbow