
How To Restore Old Binoculars?
Restoring old binoculars requires a systematic assessment of their condition to determine the extent of restoration needed.
Whether you’ve inherited a family heirloom or stumbled upon a vintage pair at an antique store, carefully evaluating their condition is the first step toward bringing them back to life.
Preliminary Inspection and Assessment
Inspecting the Exterior for Signs of Wear, Rust, and Damage
Begin your restoration journey by closely examining the exterior of the binoculars. Look for the following signs of wear, rust, and damage:
- Cosmetic Wear: Scratches, scuffs, and dents on the body or casing.
- Rust: Check metal components for any signs of rust, especially in hinges or joints.
- Cracks and Chips: Inspect the body and eyepieces for cracks or chipped paint.
- Missing Parts: Note any missing screws, lens covers, or other components.
Checking the Optical Components for Dirt, Fungus, and Haze
The optical elements of binoculars are crucial for clear and crisp viewing. Examine these components closely for issues that might affect their performance:
- Dirt and Dust: Inspect lenses and prisms for accumulated dirt and dust particles.
- Fungus: Look for hazy or cloudy spots on the lenses, which could indicate fungal growth.
- Haze: Check for a foggy appearance in the optics, caused by deterioration of lens coatings.
Evaluating the Functionality of Focus Mechanisms and Eyecups
Binoculars with functional focus mechanisms and adjustable eyecups offer a more enjoyable viewing experience. Test these components:
- Focus Mechanism: Adjust the focus knob to ensure smooth movement without stiffness or grinding sounds.
- Eyecups: Extend and retract the eyecups to confirm they work properly and hold their position.
This assessment will guide your restoration process and help you decide which specific areas need attention.
Gathering Necessary Tools and Materials
Once you’ve assessed the condition of your old binoculars, it’s time to gather the tools and materials necessary for their restoration.
Proper tools and cleaning supplies are essential for safely and effectively bringing your vintage optics back to life.
List of Tools Required for Restoration
Before you embark on the restoration process, ensure you have the following tools at your disposal:
- Screwdrivers: Phillips and flat-head screwdrivers for disassembly if needed.
- Tweezers: Fine-tipped tweezers for handling small components.
- Cotton Swabs: Used for applying cleaning solutions and reaching tight spots.
- Microfiber Cloths: Soft, lint-free cloths for wiping and cleaning optics.
- Lens Cleaning Brushes: Soft brushes designed for gently removing dust and debris.
- Blower Bulb: To blow away dust particles without touching the optics.
- Lubricants: Light and appropriate lubricants for focus and hinge mechanisms.
Mention of Cleaning Supplies
Cleaning supplies play a pivotal role in restoring the optical clarity and overall appearance of your binoculars. Ensure you have the following cleaning supplies ready:
- Optical Cleaning Fluid: A specialized cleaning solution like ZEISS Lens Cleaning Solution designed for cleaning lenses and prisms
- Lens Cleaning Cloths: Microfiber cloths or lens tissues for gentle cleaning of optics.
- Isopropyl Alcohol: Used sparingly to remove stubborn residues, if recommended by the manufacturer.
Sourcing Replacement Parts if Necessary
In some cases, vintage binoculars may require replacement parts to restore them to their former glory.
While sourcing replacement parts might be challenging, it’s worth considering if your binoculars have missing or irreparably damaged components:
- Eyecups and Lens Covers: Missing eyecups or lens covers can be sourced from specialty suppliers or antique shops.
- Screws and Small Parts: If any screws or small parts are missing, try to find replacements that match the original design.
Remember that using the right tools and materials is crucial to avoid causing further damage during the restoration process.
Investing in quality cleaning supplies and replacement parts, if needed, will ensure a successful restoration that respects the historical and sentimental value of your vintage binoculars.
Restoration of an Old Binocular :An Interesting Video
Cleaning the Exterior
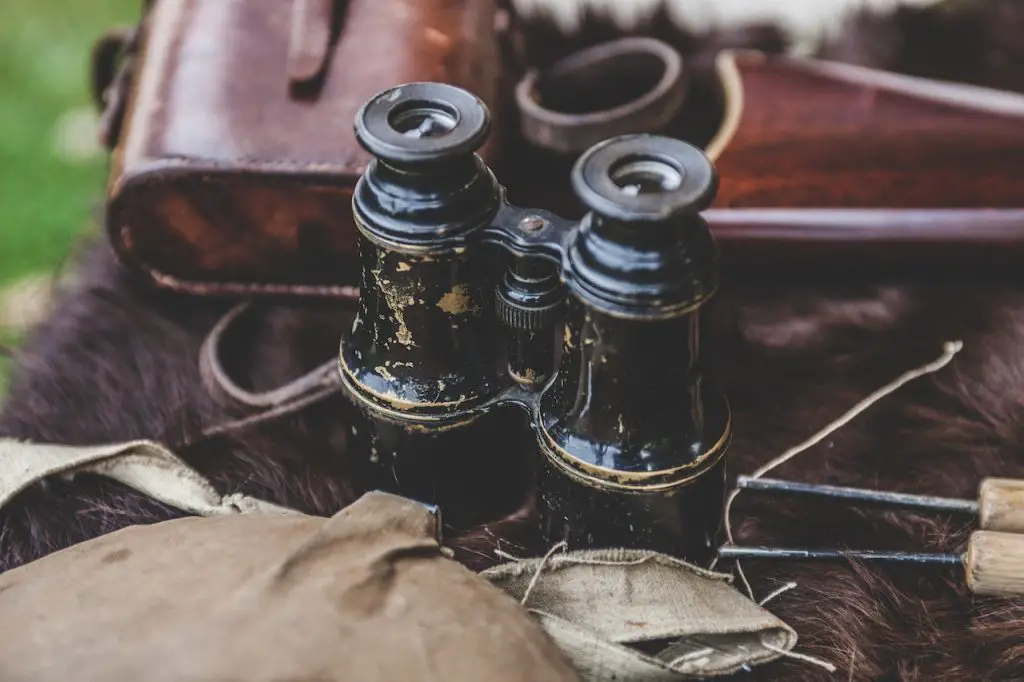
The exterior of vintage binoculars often carries the marks of time, from dust and dirt to rust and wear.
Cleaning the exterior not only enhances their appearance but also preserves their historical value. Follow these steps to safely clean the binoculars’ body and bring back their original charm.
Step-by-Step Instructions for Safely Cleaning the Binoculars’ Body
- Preparation: Find a clean, well-lit workspace and gather your cleaning supplies.
- Dust Removal: Use a soft brush or blower bulb to gently remove loose dust and debris from all crevices and corners of the binoculars.
- Cleaning Solution: Dampen a microfiber cloth with a small amount of optical cleaning fluid. Gently wipe the body to remove dirt and grime.
- Stubborn Stains: For stubborn stains or sticky residue, slightly dampen a cotton swab with the cleaning solution and gently rub the affected area.
- Rust Removal: If you notice rust spots on metal components, lightly dampen a cotton swab with isopropyl alcohol. Gently rub the rusted area to remove the rust.
Removing Dirt, Grime and Rust Using Appropriate Techniques and Materials
- Choosing Cleaning Solutions: Opt for mild optical cleaning solutions that are safe for various materials. Avoid abrasive cleaners that can damage the surface.
- Microfiber Cloth: Use a soft microfiber cloth to avoid scratching the surface while wiping away dirt and grime.
- Cotton Swabs: When using cotton swabs, ensure they are clean and lint-free. Gently rub surfaces to avoid causing scratches.
- Isopropyl Alcohol: If using isopropyl alcohol to remove rust, apply it sparingly and only on the affected area. Wipe away excess moisture promptly.
- Patience and Gentle Handling: Approach the cleaning process with patience and a gentle touch. Avoid excessive pressure, which could damage delicate surfaces.
Regular cleaning not only restores the exterior’s appearance but also safeguards the binoculars’ structural integrity.
Lubricating Mechanisms
Smooth and functional mechanisms are essential for an enjoyable binocular experience.
Over time, focus and hinge mechanisms can become stiff or sticky due to dust or lack of lubrication.
Proper lubrication helps restore these mechanisms to their optimal performance, ensuring your vintage binoculars are functional and comfortable to use.
Identifying and Addressing Stiff or Sticky Focus Mechanisms
- Assessment: Test the focus knob by adjusting it. If you notice stiffness, uneven movement, or resistance, the focus mechanism may require attention.
- Cleaning: Start by gently cleaning the focus mechanism with a dry, clean brush to remove dust and debris that might be causing the issue.
- Lubrication: Apply a small amount of appropriate lubricant to the focus mechanism. Use a precision applicator or a cotton swab to reach tight spaces.
Applying Appropriate Lubricants to Ensure Smooth Adjustments
- Lubricant Selection: Choose a lightweight and non-greasy lubricant specifically designed for optics or precision mechanisms. Avoid heavy or petroleum-based lubricants.
- Applying Lubricant: Apply a minimal amount of lubricant to the moving parts of the focus mechanism. Excess lubrication can attract dust and hinder performance.
- Smooth Movement: After applying lubricant, work the focus knob back and forth to evenly distribute the lubrication and ensure smooth movement.
Ensuring Proper Functioning of Hinge Mechanisms and Eyecups
- Hinge Mechanisms: Check the hinge mechanisms for smooth opening and closing. If hinges are stiff, apply a small amount of appropriate lubricant to enhance movement.
- Eyecups: Ensure the eyecups can be extended and retracted without difficulty. Apply lubricant sparingly if needed to prevent sticking.
Remember, when applying lubricants, less is more. Applying too much lubricant can attract dust and dirt, which may lead to more problems.
Additionally, always use lubricants that are safe for optics and precision instruments to avoid damaging the delicate mechanisms of your vintage binoculars.
Properly lubricated mechanisms contribute to a seamless and enjoyable viewing experience, preserving both the functionality and value of your cherished optics.
Polishing and Refinishing (if Desired)
If you’re aiming to restore your vintage binoculars not only in functionality but also in appearance, polishing and refinishing can be optional steps to consider.
These steps can breathe new life into worn or tarnished binoculars, but they require careful execution to avoid causing damage.
Here’s how you can achieve a renewed and polished appearance without compromising the integrity of your optics.
Optional Steps for Polishing Metal Parts or Refinishing the Exterior
- Polishing Metal Parts: If your binoculars have metal parts that have lost their shine, consider polishing them. Use a mild metal polish applied to a soft cloth, and gently rub the metal surfaces in circular motions. Buff with a clean cloth to achieve a polished look.
- Refinishing the Exterior: Refinishing involves restoring the paint or coating of the binoculars’ exterior. This step is recommended for experienced restorers, as it requires careful stripping, priming, and repainting to maintain the authenticity of vintage binoculars.
Tips for Achieving a Renewed and Polished Appearance Without Damaging the Binoculars
- Test in an Inconspicuous Area: Before proceeding with polishing or refinishing, test the method in a hidden or inconspicuous area to ensure it doesn’t cause damage or unwanted results.
- Gentle Pressure: Apply gentle pressure while polishing or refinishing to avoid scratching or removing the original finish.
- Soft Materials: Use soft cloths or applicators to avoid scratching the surface. Microfiber cloths work well for gentle polishing.
- Avoid Abrasives: Avoid abrasive materials or harsh chemicals that can damage the delicate surfaces of vintage binoculars.
- Preserve Original Patina: If your binoculars have a desirable aged patina, consider preserving it rather than attempting to achieve a completely new appearance.
- Professional Help: If you’re unsure about refinishing or polishing, seek advice or assistance from professionals who specialize in restoring vintage optics.
While polishing and refinishing can enhance the aesthetics of your binoculars, they should be approached with caution, especially if you value the original character of your vintage optics.
If done correctly, these steps can add a touch of elegance and charm to your restored binoculars without compromising their historical value.
Reassembly and Testing
After thoroughly cleaning, lubricating, and potentially polishing your vintage binoculars, the final step in the restoration process is reassembly and testing.
Ensuring that all components are properly aligned and functional is crucial for a successful restoration outcome.
Here’s how to complete this vital stage of the restoration process.
Step-by-Step Instructions for Reassembling the Binoculars
- Organize Components: Lay out all cleaned and restored components in a clean workspace. Keep screws and small parts organized and easily accessible.
- Reverse Disassembly Steps: Follow the reverse order of disassembly to reattach components. Start with the larger components and work your way to smaller parts.
- Secure Screws: Gently tighten screws, being cautious not to over-tighten and risk damaging threads.
- Attach Optics: If any optical elements were removed for cleaning, carefully reattach them, ensuring proper alignment and orientation.
Checking the Functionality of All Components, Including Focus and Alignment
- Focus Mechanism: Test the focus knob for smooth and even movement. Ensure it provides clear focus throughout the entire range.
- Hinge Mechanism: Check the hinge mechanism for proper opening and closing. Binoculars should open and close smoothly without excess play.
- Eyecups: Test the eyecups for proper extension and retraction. They should stay in position once adjusted.
- Alignment: Look through the binoculars and ensure that both sides are aligned and provide a single, clear image.
Performing a Test Viewing to Assess Optical Performance
- Choose a Distant Target: Select a distant object to view through the binoculars. This could be a building, a tree, or any distinct object.
- Focus Adjustment: Use the focus knob to adjust the image until it’s sharp and clear.
- Evaluate Clarity and Sharpness: Assess the optical performance for clarity, sharpness, and color accuracy. Pay attention to any abnormalities or distortions.
- Check for Collimation: Collimation refers to the alignment of both barrels. Look for double images or misalignment and adjust if necessary.
An Interesting Video: Restoring an Old and Vintage Binoculars
Should You Restore Old Binoculars?
Things were made so much better back then! That’s why I collect and restore vintage/antique wood working tools. They were made to last.
Similarly, restoring old binoculars can be a rewarding endeavor.
Vintage binoculars often possess a level of craftsmanship and durability that’s hard to find in modern optics.
Restoring them not only brings back their original charm but also allows you to experience the optical quality and engineering precision that were valued in the past.
Whether you’re a collector, a history enthusiast, or simply someone who appreciates the craftsmanship of yesteryears, restoring old binoculars can provide you with a tangible connection to the past and a unique viewing experience that modern optics might not replicate.
More Read: Are old Binoculars Worth The Money
Will Restored Binoculars Perform Equally Well as New Ones?
Restored binoculars can perform well, but they might not match the performance of new ones.
While cleaning, lubrication, and restoration can improve optical quality and mechanical functionality, modern binoculars often incorporate advanced coatings and technologies.
New binoculars might offer superior clarity, brightness, and features like image stabilization and waterproofing.
The choice between restored and new binoculars depends on your fondings for historical value, aesthetics, and cutting-edge features.
Conclusion
Testing the functionality and optical performance ensures that your vintage binoculars are not only restored aesthetically but also deliver a satisfying viewing experience.
Take your time during this stage to make any necessary adjustments and fine-tune the components for optimal performance.
With reassembly complete and successful testing, you can now enjoy your fully restored vintage binoculars to their fullest potential.
More Read: Best Binocular Repair Services