
How to Photograph the Moon-Complete Tutorial(With Foreground Settings)
Everyone likes to click photographs but very few get the chance to click a breath-taking photo that gives them bragging rights over others.
However, it all depends on the type of camera & lens used, timing and location of the photo, and most importantly the subject of the photo.
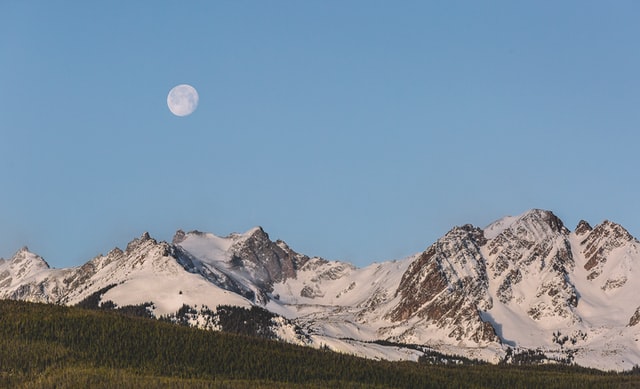
One such photo is the photograph of the moon with the foreground. Moon photography can be a great learning experience if you are able to do a little bit of experiment.
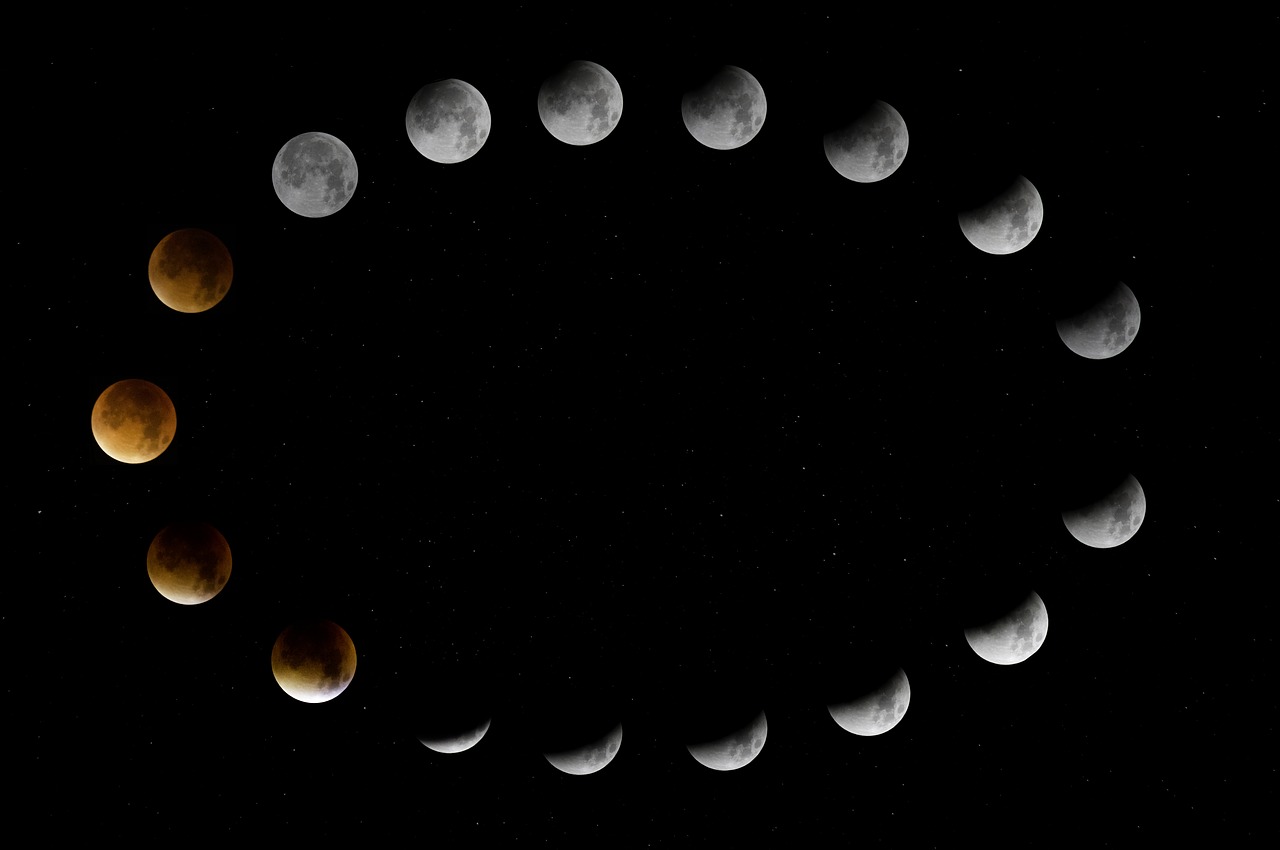
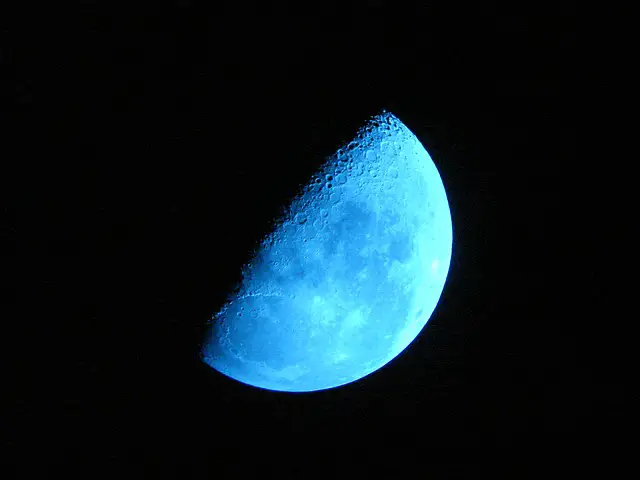
There are many types of moon pictures worth taking but some of the best ones are partial/full lunar eclipse, full moon, super moon, super blood moon, blue blood moon, blue moon, and more.
In all, there are 12-13 full moons each year with each having a distinct name, but only three or four are classified as supermoons.
The most recent full supermoon was on June 24, 2021, and the next will be on May 16, 2022.
There are several ways photography enthusiasts can take a marque picture of the full moon.
However, there are some set rules like Looney 11 that can be followed to take a great picture of the moon.
Below are some points anyone can follow, HAPPY READING!!!!
Plan Your Moon Shot
To plan your moon shot, you need to take care of the following: –
- Select date (coincides with full moon) and location (preferably higher ground).
- Select time based on moon phases.
- Select moon position with respect to the foreground object.
- Choose a date with a clear sky i.e., without clouds or atmospheric turbulence.
- Make sure the location is easily accessible.
Get Best ‘Value for Money’ Equipment
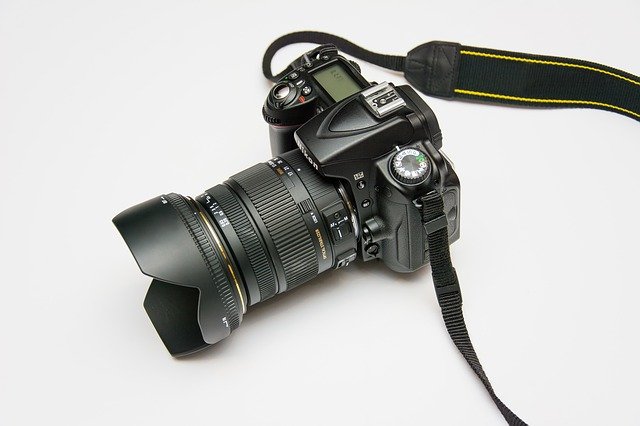
To click the best moon picture, it is important to have the best ‘value for money’ equipment at hand you can buy. If you can afford to buy a DSLR camera or buy a simple camera with maximum zoom, a telephoto lens, and a tripod.
Also, in case of more assistance is needed you can access a few applications that can make moon photography easier.
Camera Settings for Moon Photography
Moon photography especially full moon with or without any foreground objects is sometimes one of the most boring themes.
Simply because, the whole time entire moon disc is visible, meaning no variations.
Just magnify the moon and try to click as many frames as possible. Attach a telephoto lens to your camera, secure it on your tripod, and point at the full moon. But even to do that perfect moon photography , camera settings are important, such as: –
♦Image Format: always save your frames in RAW image format instead of JPEG. This way, you don’t need to worry about camera settings affecting images.
♦Camera Mode: always set your camera to full manual mode.
♦ISO: Set your camera to base ISO, i.e., ISO 100, and be sure to turn off “Auto ISO”.
♦Aperture & Shutter Speed: Set your camera aperture to f/11 and shutter speed at 1/100.
♦Lens Focus: Use the rear LCD screen of your camera to zoom in and focus on the moon. Once the moon appears sharp, set your lens to manual focus, so as to prevent your camera from refocusing automatically. Also, for manual focus, use electronic focus guides, viewfinder prism. and/or live view and focus peaking.
♦Image Stabilization: Since you are shooting with a tripod, there is no need for it.
♦Camera Shake: Use Mirror Up mode to reduce vibrations from the mirror mechanism on your DSLR camera.
♦Mirror Lock-Up: While photographing the full moon via a long telephoto lens, using a remote shutter release (wired/wireless) on an SLR camera to minimize vibrations is advised.
♦Metering: While photographing the moon, depending on the metering mode selected, the camera takes black outer space into account. So, best to use center-weighted or spot metering to expose only what is really bright in the frame.
Bracket the Exposure
As light values are different between the moon and foreground object, it is best to bracket the exposure so as to capture the best possible combination. As per some estimates, taking two series of five shots each gives the best result.
In the first series, use the largest exposure compensation set from -2 to +2; i.e., shot one at -2, shot two at -1, shot three at normal, shot four at +1, and shot five at +2.
In the second series, use the largest exposure compensation from -1.5 to +1.5; i.e., shot one at -1.5, shot two at -0.5, shot three at normal, shot four at +0.5, and shot five at +1.5.
However, exposure compensation depends on your camera design.
Once clicked, choose one picture out of the 10 or pick 2, one from each set and then combine them to get the best moon photograph.
Composition and Experiment
If you plan to photograph the moon with a foreground object, then it is important to pay close attention to composition. The type of composition chosen depends on the size of the moon relative to the foreground object.
When photographing a lone moon in the sky, the natural tendency is to keep the moon at the center of the image. Try to experiment by using ‘Rule of Thirds’. Center moon’s shadow if you are photographing a crescent moon. Rotate a quarter moon by 90 degrees.
Moon Photo Post Processing
Take Time to Post-Process: The moon appears very flat without any post-processing, especially when shooting in RAW format, as such post-processing is needed.
To make the moon look sharp, use different types of stacking, blending, and sharpening techniques in post-processing.
Be Careful with Composites: If you want to be creative with the moon image and create a composite image from completely different sets of images, avoid making the image look fake. For example – a shot of a landscape with a wide-angle lens copy-pasted with a huge moon will definitely look very fake. If using photoshop for composite images, do these to avoid looking fake: –
- Image -> Adjustment -> Curves and select “Medium Contrast” Preset from the drop-down menu and click “OK”.
- Filter -> Sharpen -> Unsharp Mask and add 150% in the “Amount” field while keeping “Radius” at 1.0 pixels and “Threshold” at 0 levels.

Moon Photography in Daylight/Lowlight Conditions
Photographing the moon in the early evening when daylight is still there is easy. As both moon and foreground objects appear bright thanks to sunlight, so its’ easy to capture the two in a single exposure.
No special settings are required, just shoot with a camera by zooming in on the moon and adjust the setting to make it look large.
However, if using a wide-angle lens, the moon will appear tiny in the picture frame. If you still wish to make the moon appear larger, better use the lens’ optical zoom.
However, then everything else will also get bigger. In that case, use the 2 picture tricks, but try avoiding the image looking fake.
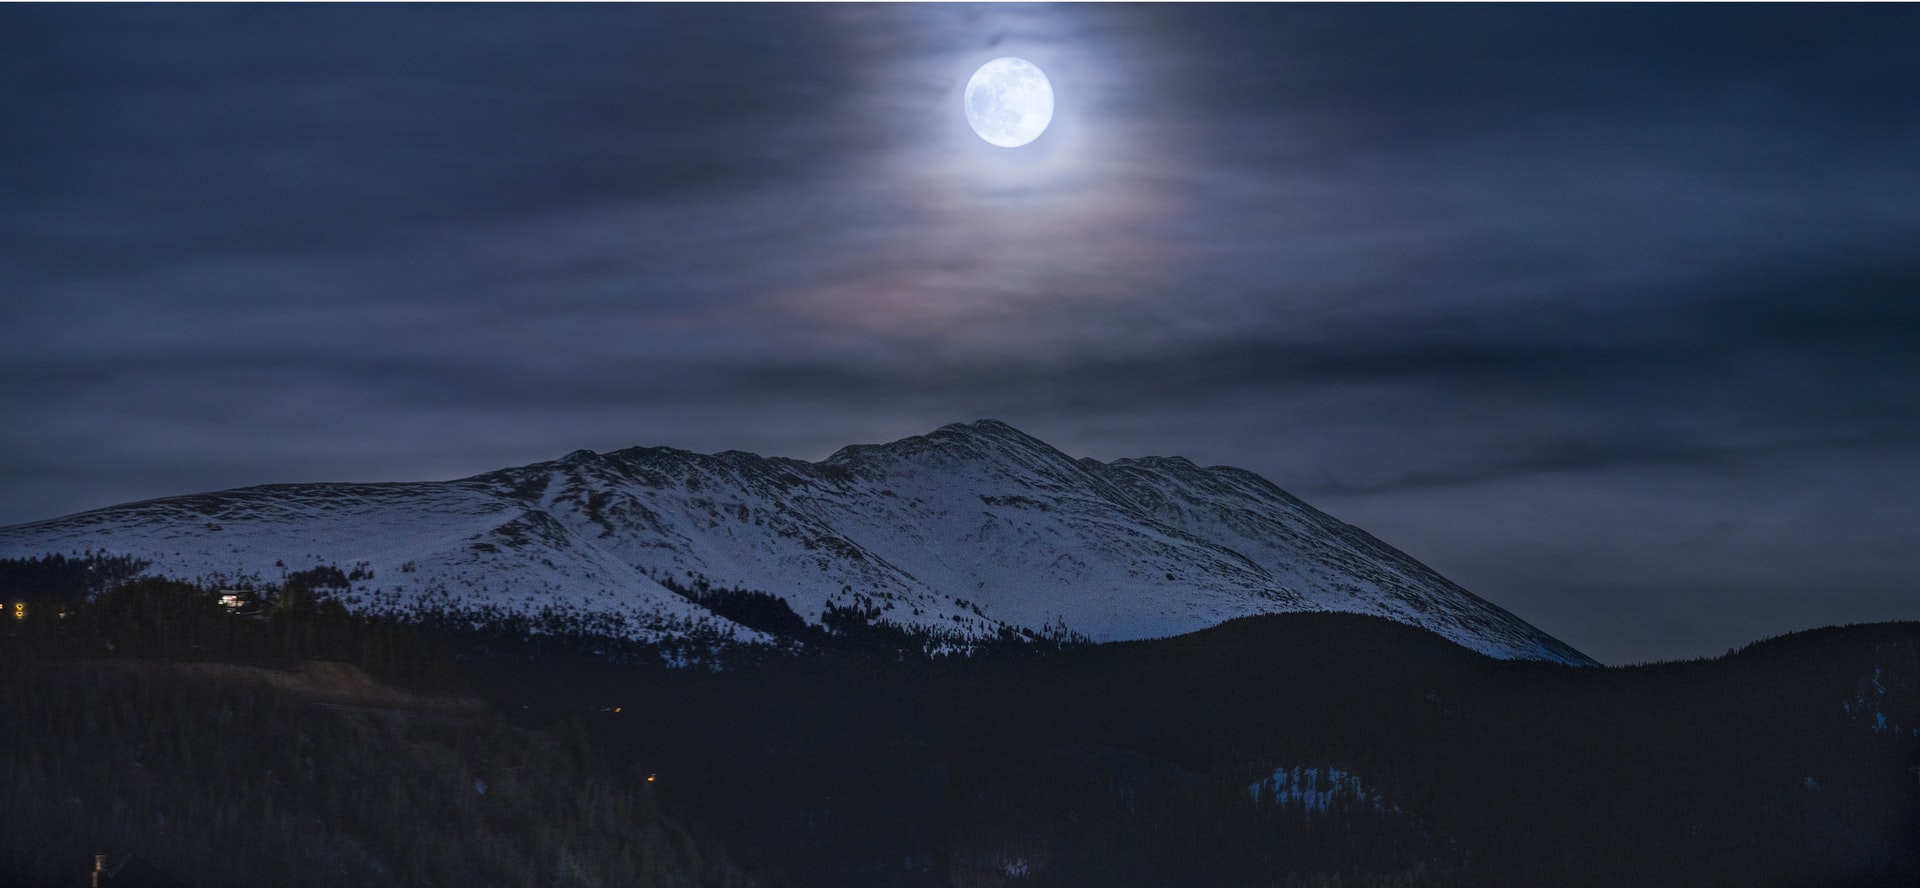
Photographing the moon in the late evening when daylight is waning is a bit more challenging due to lack of exposure.
The moon gets brighter, especially if it is a full moon. While the moon will brighten the foreground object will appear dark on camera.
If the focus is on the foreground, then the moon will appear overexposed. In that case, use the 2 picture trick.
How To Photograph The Moon- An Informative Video
Looney 11 Rule
The ‘Looney 11 rule is a method of estimating the correct exposures of the moon at night without a light meter.
The ‘Sunny 16’ rule helps daylight photography. The Looney 11 rule is a very simple guide to give the photographers a baseline to start, decide when to shoot the moon at night.
The rule states that for taking astronomical photos of the supermoon/full moon surface, you need to set the aperture to f/11 and shutter speed to the reciprocal ISO setting.
For example – set f/11 at ISO 100 and 1/100th second shutter speed meaning shutter speed is 1/100th of a second. The looney 11 rule helps you to get a good amount of exposure when photographing the full moon.
Photopills Rule of 100 x D
This rule simply states that if you want to click a photo of the moon with a foreground object, for example, a stone structure that is 10 meters high then for getting the best picture you must place your camera at 1000 meters distance from the stone structure. The value of 100 x D is 100 x 10 = 1000 meters.
Get the Moon Sized Correct
If you use a wide-angle lens to capture the foreground object then as a consequence it will result in the moon looking small in the picture. As such it is important to ensure that the moon is in the correct position and it appears in correct size.
Choose Focal Length of Photography
Instead of choosing a wide-angle lens that covers foreground detail, use a telephoto lens to make the moon appear larger in your picture frame.
An image of the moon rising above treetops works well as a silhouette, removing the need to use HDR techniques to balance the exposure.
Use Apps to Position Moon
Use smartphone apps like Lumos to find the position of the moon around the time of the shoot.
Some apps have a “Night Augmented Reality Mode” that overlays the moon on your foreground object to calculate the precise time and location.
TimeAndDate.com/moonphase helps find the current moon phase and other upcoming lunar events.
Dark Sky Finder helps find the best spots with the lowest air pollution.
Photographer’s Ephemeris 3D has useful information on moon photography. Photo Pills helps time your photography with moon phases in Augmented Reality (AR) mode.
Moon Photography with a Smartphone/Tablet
If you want to photograph the moon with a foreground object with a smartphone or a tablet equipped with a camera, the biggest issue is precise focus and exposure control.
Smartphones and tablets are designed with a single wide-angle lens, not particularly suitable for moon photography. As such taking a close-up shot of the moon is difficult.
If using a smartphone-like iPhone with a single camera, options are limited for photographing the moon due to the very wide-angle field of view.
Shooting with ample daylight may still be easy but at night, you will end up with a small white blob. It’s because the camera will automatically meter off the whole scene and the moon is just way too small for a subject.
If using a smartphone-like iPhone with a dual camera, then you can use its telephoto lens to capture decent photos of the moon.
Just zoom in, and pull the brightness slider down to properly expose the moon, and click. No matter what smartphone for moon photography has limits.

When to photograph the Moon
The best time to photograph the moon is the day before or after a fool moon-but it is actually one of the most difficult due to the glare of the moon at this lunar event.
You would be able to take some cool shots when the moon is behind a building or a mountain. This makes the moon look more profound.
Bonus: A Photography Trick
If you are so perturbed by the technicalities involved in taking a moon picture. Just follow, the 2-photograph trick to get the best pic.
All you need to do is to take 2 pictures. The first picture will have the full moon in ‘focus’ and foreground ‘out of focus’. The second picture will be of foreground in ‘focus’ and full moon ‘over focused’ or exposed.
Some photographers use a wide-angle lens to capture the foreground objects, and then take a closer shot of the full moon by using a longer focal length.
Once clicked download both pictures on the computer and use the simple ‘paint’ or a similar application to merge the first picture into the second picture and voila you will have a picture with both full moon and foreground in focus. 😊
Conclusion
Capturing the perfect moon shot on camera is not easy. You can use a variety of cameras, and even smartphones/tablets to click photographs of the moon.
But it is important that you follow certain rules, to ensure that the end result is the best.
Most of the time, photographers take 2 pictures of the moon and foreground separately and then combine them.
As such it is very important to declare that an image has been artificially modified/doctored. Planning, equipment, exposure, camera setting, photo processing, focal length, size; all play a key role in taking perfect moon pictures.
It’s all about patience; keep trying for the perfect shot, by being persistent in your approach. GOOD LUCK !!!! for May 16, 2022
If you are interested in binoculars photography check here about how to take pictures through your binoculars